The following article below will show you how how to add a single WebUnlimited Email mailbox or multiple mailboxes using a .CSV file. Let’s take a look at the following steps to get you going:
- First thing you’ll want to do is login to the control panel at “yourdomain.com/cpanel” and in the Email Accountssection, select the Add / Edit Mailbox link for Microsft Exchange.
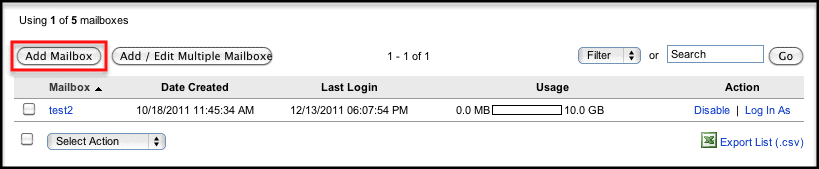
- If you have multiple domains, select the appropriate domain name; otherwise select the Add Mailbox button.
- Next, enter the following information in the fields provided:
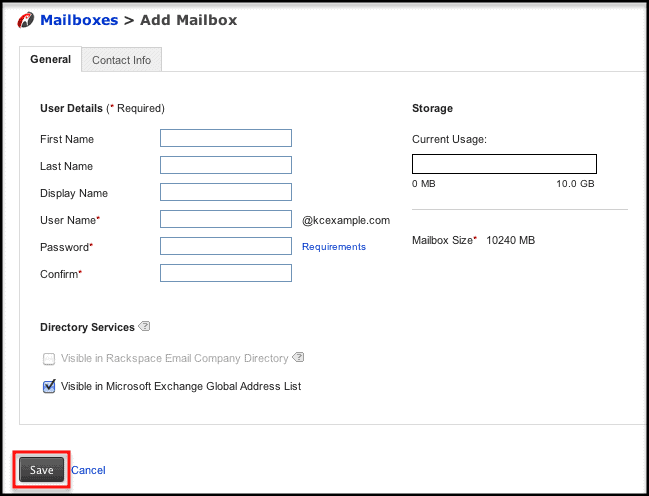
- User Name – This will be the email address: E.g. [email protected].
- Password – Enter in a password for the email account. Password must be at least 6 characters long, cannot contain a numeric sequence longer than 3 characters, cannot contain the domain name, and cannot contain the user name.
- Confirm – Retype the password you entered in the Password box.
- First and Last Name – Enter first and last name information for the mailbox owner in the spaces provided. This is optional.
- Display Name – Enter in the name that should be associated with the mailbox. This name will be displayed when the user sends email. This is optional.
- Select the Save button and the mailbox will appear in the list. To manage additional features for the mailbox, such as Forwarding / Auto-Reply, Aliases, and/or Settings, click the mailbox name and then click the corresponding tab.
Adding Multiple Mailboxes: To add multiple mailboxes at once; please see the following instructions below:
- First thing you’ll want to do is login to the control panel at “yourdomain.com/cpanel” and in the Email Accounts section, select the Add / Edit Mailbox link for either WebUnlimited Email or Microsft Exchange.
- If you have multiple domains, select the appropriate domain name; otherwise select the Multiple Add Mailbox button.
- Next, you’ll create a CSV or Excel file, containing the information detailed in the Data Format section.
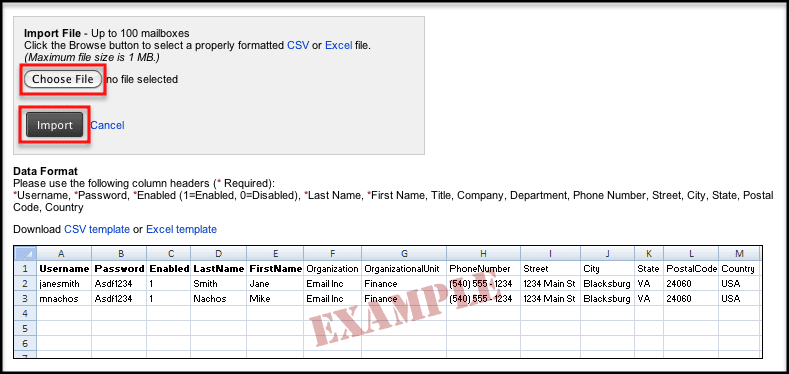 Note: Passwords must contain at least 8 characters, including at least 3 of the following: English uppercase characters; English lowercase characters; numerals (0-9); and non-alphabetic characters (such as !, #, $, %).
- In the Import File section, click the Browse button and locate and select your CSV or Excel file you created.
- Click the Open button and then the Import button. Mailbox information will be imported and the mailboxes will be created. Any errors that occur will be detailed in the import